Two challenges created by the typical bottling bucket are the size of the bucket and the typical placement of the spout hole. The size of the bucket means the beer awaiting packaging ends up in a wide and shallow shape. The need to start tipping the bucket towards the spout while bottling starts early in the bottling run which means you're trying to balance the bucket and fill bottles. That creates a lot of opportunity for the bucket to rock back and forth and oxidize the beer. Not good. The spout is usually placed roughly two inches from the bottom of the bucket, which means as you tip the bucket forward you create dead space where the beer gets trapped in the bottom of the bucket beneath the hole in the back of the spout.
My solution was to obtain a smaller bucket and convert it into a bottling bucket for small batches of homebrew. Honestly, I have no idea why I didn't do this before. The bucket I chose was this two gallon white paint bucket from Home Depot. (http://www.homedepot.com/p/Leaktite-2-gal-Bucket-2GL-WHITE-PAIL/202264039) I believe this particular bucket is not designed with a lid that can be reused (like most paint buckets) so it may not be a great option for a fermentor. I don't need a lid for bottling so it isn't a problem. It is HDPE #2 so it is food grade. (If you are looking for a bucket to use as a small batch fermentation vessel, there are good food grade buckets available from restaurants, bakeries, etc. that have resealing lids.)
Converting the bucket to a bottling bucket is really simple work. Just drill a hole. I drilled the bucket to fit the standard bottling bucket spout. To drill the hole I used a one inch spade bit. A couple of pieces of advice. First, make sure you secure the bucket before drilling. The spade bit will vibrate the plastic and try to twist the bucket. That will cause a larger hole than what you want. Also, if your drill has adjustable torque you need to adjust the torque down so the bit doesn't dig into the plastic so hard it cracks or rips the plastic. Once the hole was drilled I filed off some loose pieces and smoothed out the exterior of the hole with some fine grit sandpaper to make sure the spout forms a tight seal.
 I set the middle of the hole at one and a half inches above the bottom of the bucket, which gives me enough clearance to set the bucket on the counter with the spout turned upright and the bucket can sit even while filing. You want to make sure you give yourself enough room on the inside to be able to turn the nut to completely seal the bucket. If you drill too low you may find yourself digging into the plastic to tighten the nut, which damages the smooth surface you want on the plastic.
 The hole doesn't have to be perfect and it probably won't be because the plastic on these buckets is more pliable than your typical bottling bucket and that makes drilling a perfect circle more challenging. All you need is a hole big enough for the back of the spout to fit but small enough that it forms a watertight seal. I put some colored paper in the bucket against the hole so you can see that I didn't do a perfect job. It seals just fine.
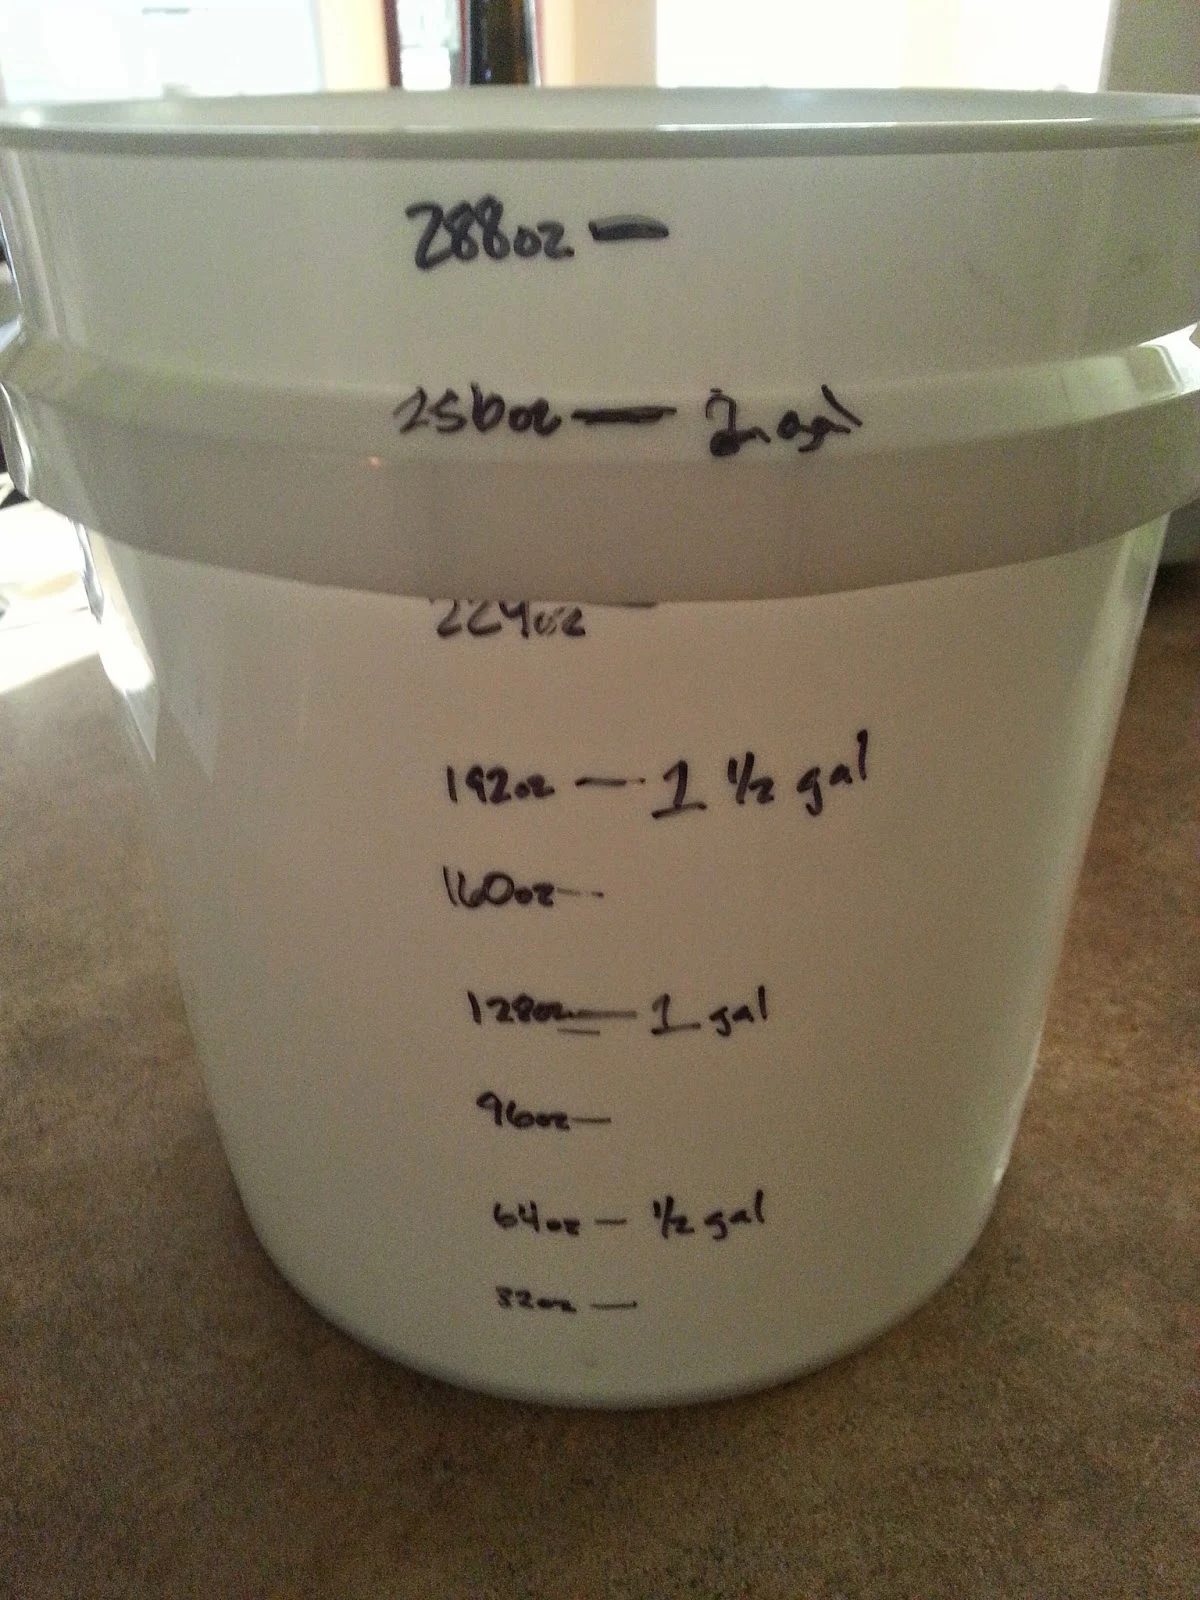
Then I used a measuring cup to add water and did a rough job of marking it off in 32oz. intervals. I measured after drilling with the spout attached because the spout will hold a little liquid and I only need to know the volumes with a spout attached. Pretty obvious. The bucket holds a little over two full gallons.
There you go. A really easy build. I know, it's not the awesome work some of you guys and gals do on your brewing systems but for those of us who are not technically capable this is an easy fix to a problem that had annoyed me for a while.


My primary concern with using some kind of pickup tube in a bottling bucket is getting oxygen trapped in the tube while filing the bucket and then sucking in more air at the end of the bottling run when suction breaks. It seems like a good opportunity to have bottles at the beginning and end of the bottling run with more oxygen exposure than necessary. I might be wrong on that.
ReplyDeleteMy lesser concern is that pulling beer up from the bottom increases the probability that any sediment picked up from the fermentor will make its way into the bottles, rather than staying behind in the bucket's dead space.
Or buy a smaller bottling bucket...
ReplyDeletehttp://www.theamericanhomebrewer.com/american_home_brewer_161.htm
Which is the same bucket I bought at 20% of the cost.
ReplyDelete